
You leave the hotel at 7:45 AM. The air is already thick—dew point pushing 75°F, the kind of humidity that makes your skin feel damp before you have walked half a block. You step into the client's office at 8:15. The air conditioning hits you like a wall. By 10 AM, your foundation has separated around the nose. By noon, the powder you set with has turned into a visible, chalky film. By 2 PM, you are blotting in a bathroom mirror wondering what went wrong.
The problem is not the humidity. It is not the air conditioning. It is the transition between them—and the fact that most makeup routines are built for one climate, not two.
Why the Outdoor-to-Indoor Transition Destroys Makeup

Makeup breakdown in a humid-to-dry transition is not a single failure. It is a chain reaction that starts the moment you step outside.
In high heat and high humidity, sebum and sweat secretion increase. This causes plasticization of the foundation's binding phase—the polymers that hold the pigment together become overly soft, leading to more movement and transfer. The foundation that looked flawless in the hotel mirror begins to slide.
Then you step into air conditioning. The dry indoor air pulls moisture from the stratum corneum. Transepidermal water loss increases, and powders settle into the skin's fine cracks, becoming visible as pore settling and flaking. The same powder you used to control shine in the humidity now emphasizes every dry patch you did not know you had.
The practical consequence: a routine that controls oil in humidity will crack in air conditioning. A routine that hydrates for dry air will slide in humidity. You cannot solve this with a single product. You solve it with a layering strategy that adapts between environments.
The Core Principle: Thin Layers, Strategic Placement, Temperature Control
The most common mistake in humid-to-indoor transitions is over-application. Heavy layers of foundation trap moisture in humidity and crack in dry air. The fix is not more product. The fix is thin layers, placed strategically, and sealed at the right moments.
Professional makeup artists who work in tropical climates with constant AC transitions describe the approach as "smart layering"—distinct from heavy layering. The goal is to control movement, not to stop sweat. Sweat is going to happen. The question is whether your makeup moves with it or stays in place.
Step 1: Skin Prep—The Two-Climate Foundation (5 Minutes)
Your skincare routine must prepare the skin for both environments. This is the step most people skip, and it is the step that determines whether the rest of the routine survives.
Cleanse gently.
Use a gentle cleanser that does not strip the skin. Over-drying triggers compensatory sebum production, creating a vicious cycle: dryness leads to more oil, and more oil leads to breakdown. In humidity, you do not need to remove every trace of oil. You need to remove sweat, sunscreen residue, and last night's products without compromising the barrier.
Apply a gel-based moisturizer.
Thick creams create too much slip in humidity, causing foundation to migrate. Swap in a gel-based moisturizer that absorbs quickly and hydrates without leaving a heavy film. Look for ingredients like hyaluronic acid and glycerin, which draw moisture into the skin without adding excess oil.
The critical timing rule: Wait 2–3 minutes after moisturizing before applying primer or foundation. This allows the product to fully absorb and set. If you apply makeup over tacky moisturizer, the foundation will not bond to the skin—it will bond to the moisturizer, which will move.
Add a temperature-control step.
This is the step most people skip, and it costs nothing. Cool the skin before applying any makeup.
Warm skin causes products to shift on contact. A cooled, settled skin surface allows genuine adhesion. Professionals describe this as temperature-balancing the skin—it takes less than two minutes and changes wear time significantly.
How to do it: After moisturizing, press a cool, damp washcloth against your face for 30 seconds. Or keep your moisturizer in the fridge. Cold contracts the pores and creates a smoother, more stable base for foundation. If you are in a hotel, run cold water over a washcloth and press it against your T-zone. This is not a luxury step. It is a structural one.
Step 2: Primer—The Anti-Transition Barrier (2 Minutes)
Primer is your barrier between the skin and the environment. In a humid-to-dry transition, you need a primer that grips without adding moisture.
Use a gripping primer, not a hydrating one.
In humid weather, a mattifying or gripping formula helps create a barrier against sweat and oil so your base does not start moving. Look for ingredients like dimethicone or polyacrylamide for that "grip" effect.
Apply only where you need it. You do not need a full face of primer. Focus on the T-zone—forehead, nose, and chin—where sweat and oil break through first. The cheeks can go without primer if they are not prone to shine. This thin, targeted application prevents the heavy, suffocating feel that full-face primer creates in humidity.
What not to use.
Do not use a hydrating or "dewy" primer in humidity. Hydrating primers add moisture to the skin surface. In high humidity, that moisture has nowhere to go. It sits on the skin, mixes with sweat, and becomes a slip layer that accelerates foundation breakdown.
Step 3: Base—Thin, Buildable, Film-Forming (3 Minutes)
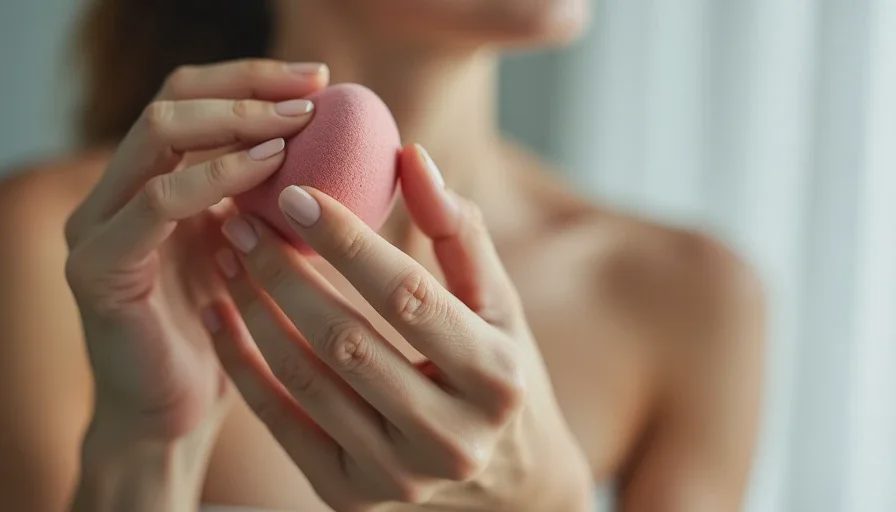
The foundation is where most routines fail. Heavy, full-coverage foundations break down quickly in heat and humidity, ending up patchy and uneven.
Choose the right formula.
Look for a long-wear, transfer-resistant formula labeled as "sweatproof" or "humidity-resistant," but one that is not full coverage. The goal is a natural finish that resists heat and humidity without feeling heavy.
Best formula categories for a humid-to-dry transition:
Film-forming foundations. These use polymers that create a flexible, skin-adhering layer resistant to sweat and humidity without relying on powder to stay in place.
Water-based or oil-free fluids. These let the skin breathe while still evening out tone. Avoid heavy oil-based formulas that become mobile in heat.
Serum foundations or skin tints. These move with the skin rather than sitting on it, which is exactly why they hold better in humidity.
Apply in thin layers.
Do not apply one thick layer. Apply a thin layer, let it set for 30–60 seconds, then add a second thin layer only where you need more coverage. Thin layers allow the skin to breathe and prevent the heavy, cakey feel that breaks down faster in humidity.
Use a damp sponge, not your fingers.
Your fingers conduct heat, which can cause products to break down faster or apply unevenly. A damp makeup sponge presses foundation into the skin while keeping application cool and even. The sponge also absorbs excess product, preventing that heavy, mask-like feel.
Pro tip: Rinse your sponge in cold water before application. The cool temperature helps refresh the skin and slows product breakdown.
Mix serum into the foundation if the air is very dry.
If you are in an environment with aggressive air conditioning, mix a few drops of hyaluronic acid serum into your foundation on the back of your hand before applying. This thins the foundation, provides lighter coverage, and adds moisture to skin that dries out from the sun and air conditioning. The serum also slows the drying process, which means the foundation stays flexible longer and is less likely to crack when you move from humid outdoor air into dry indoor air.
Step 4: Powder—Strategic, Not Everywhere (1 Minute)
Powder is the most misunderstood product in a humid-to-dry transition.
In humidity: Powder helps control shine and sets the base.
In air conditioning: Powder sits on top of dry skin, emphasizes flakes, and creates a tight, uncomfortable film.
Powder only where you break down.
Apply translucent, finely-milled setting powder only to the forehead, nose, and chin—the areas most prone to oil production. Do not powder the cheeks, the jawline, or the perimeter of the face. Those areas do not produce enough oil to need powder, and in dry indoor air, powder on the cheeks will crack.
Use the smallest amount possible. Dip a finger into the powder, tap off the excess, and press—do not swipe—onto the T-zone. Pressing locks the powder into the foundation and prevents the cakey separation that happens when powder sits on top of dry foundation.
The sandwich method for extra hold.
For maximum longevity in a transition environment, try the "sandwich method" : apply setting spray between layers—after foundation, and again after powder. This creates a flexible, bonded film that resists both humidity and dry air.
Step 5: Setting Spray—The Temperature Regulator (1 Minute)
Setting spray is the difference between makeup that survives the transition and makeup that separates at the first temperature change.
Choose a temperature-regulating spray, not a mattifying or hydrating one.
A mattifying setting spray will make dry indoor air feel tighter and more uncomfortable. A hydrating setting spray adds moisture that humidity will exploit. You need a spray that regulates temperature—locking makeup in place without adding moisture or mattifying powder.
Urban Decay All Nighter is the most documented cross-climate setting spray. It lowers the temperature of your makeup to keep foundation and concealer in place, and it is explicitly formulated for both hot and humid and cold and windy conditions. It does not add moisture and it does not mattify with powder. It locks the base in place regardless of the climate.
How to apply.
Spray after foundation and powder, not before. Hold the bottle 8–10 inches from your face and mist in a Z-pattern. Do not spray so much that the skin looks wet. One light pass across the forehead, one across the nose and cheeks, one across the chin. A light, even layer is enough to bond the layers together.
Step 6: The Transition Protocol—What to Do When You Move Between Environments
This is the step that separates a routine that works in theory from one that works in practice. The products are the same. The maintenance changes.
When you move from humid outdoor air into air conditioning:
Do not blot immediately. Give your skin 5–10 minutes to adjust to the temperature change. Blotting immediately after entering a cold room can remove the surface film that is still setting, leaving the foundation vulnerable.
If the T-zone feels shiny after 10 minutes: Press a blotting paper against the forehead and nose. Do not wipe. Pressing removes surface oil without disturbing the base. Do not add powder. Powder over a fresh base in dry air creates patchiness.
If the cheeks feel tight: Do not add more foundation. Press a small amount of lotion or a hydrating facial mist onto the cheeks with your fingers. The tightness is dehydration, not oil. Adding powder will make it worse.
When you move from air conditioning back into humid outdoor air:
Blot before you leave the building. Press a tissue against the T-zone to remove any surface oil that accumulated in the dry indoor air. This prevents the oil from mixing with outdoor humidity and creating a slip layer.
Do not reapply powder before going outside. Powder applied indoors will mix with outdoor humidity and turn into a visible, textured layer within 30 minutes. Blotting is enough.
The Two-Climate Kit: What to Pack
Category | Product Type | Why It Works in Both |
|---|---|---|
Prep | Gel-based moisturizer with hyaluronic acid | Hydrates without slip in humidity; prevents cracking in dry air |
Primer | Gripping primer (T-zone only) | Creates a barrier against sweat; does not add moisture |
Base | Film-forming, water-based, thin-layer foundation | Resists humidity without powder; stays flexible in dry air |
Powder | Translucent, finely-milled (T-zone only) | Controls shine where needed; does not cake on dry cheeks |
Setting | Temperature-regulating spray | Locks makeup without adding moisture or mattifying |
Touch-up | Blotting papers + hydrating mist | Blot in humidity; mist in dry air |
FAQ: Humid Outdoor-to-Indoor Makeup Transitions
What if my foundation separates around the nose within an hour?
The nose is the first area to break down because it produces the most oil and experiences the most friction. Apply a gripping primer specifically on the nose before foundation. After foundation, press a tiny amount of translucent powder onto the nose with a finger. Do not brush—press. If separation happens during the day, blot the area with a tissue, then tap a small amount of concealer over the separated area and blend the edges with your finger. Do not add more foundation.
What if my powder turns chalky in the air conditioning?
This means you applied too much powder, or you applied it to areas that do not produce enough oil. Powder only the T-zone. If the cheeks feel tight, do not add powder. Press a small amount of lotion or a hydrating facial mist onto the cheeks with your fingers. The chalkiness is dehydrated powder sitting on dehydrated skin. Moisture, not more powder, is the fix.
What if I have oily skin and the gripping primer feels too drying?
Use a gel-based moisturizer underneath and let it absorb fully before applying the primer. If your skin still feels tight, apply the gripping primer only to the forehead and nose, not the cheeks. Oily skin can still be dehydrated. The tight, uncomfortable feeling is dehydration, not dryness. Oil-free, lightweight moisturizers are the answer.
What if I have dry skin and the foundation cracks in the air conditioning?
Mix a few drops of hyaluronic acid serum into your foundation on the back of your hand before applying. This thins the foundation and adds moisture that counteracts the drying effect of air conditioning. Apply a hydrating primer on the cheeks—not a gripping primer. Gripping primers are for oily areas. Dry areas need hydration, not grip.
Can I use the same setting spray for both environments?
Yes, if it is temperature-regulating. Urban Decay All Nighter is the most reliable cross-climate option. A mattifying setting spray will make dry indoor air feel tighter. A hydrating setting spray will add moisture that outdoor humidity will exploit. Temperature-regulating sprays are the only category that genuinely works in both.
How do I touch up in a humid outdoor environment?
Blotting papers, not powder. Press the paper against the T-zone. Do not wipe. Blotting removes surface oil without disturbing the base. If you must use powder, use it only on the nose and only the smallest amount possible. Powder in humidity mixes with sweat and creates a visible, textured layer.
How do I touch up in an air-conditioned indoor environment?
A hydrating facial mist, not powder. A light mist reactivates the foundation and stops it from cracking. Spray from 8–10 inches away and let it dry naturally. Do not blot after misting—the moisture is the point. If the mist makes the T-zone too shiny, blot only the forehead and nose after the mist has dried.
What if my mascara smudges during the transition?
The transition from humid outdoor air to dry indoor air can cause eyes to water, which smudges even waterproof formulas. Switch to a tubing mascara—it resists humidity and does not dissolve in tears. L'Oréal Double Extend Beauty Tubes and Milani Highly Rated are the most reliable drugstore options. Tubing mascaras wrap each lash in a polymer tube that slides off with warm water and gentle pressure, leaving no residue.
What if I only have five minutes to get ready?
Skip the powder entirely. Apply gripping primer on the T-zone, then a thin layer of film-forming foundation, then setting spray. Blot the T-zone with a tissue before you leave the bathroom. The blotting removes excess product without removing pigment. In a humid-to-dry transition, blotting is more effective than powder for controlling shine without creating a chalky film.



No notes yet — write the first one.